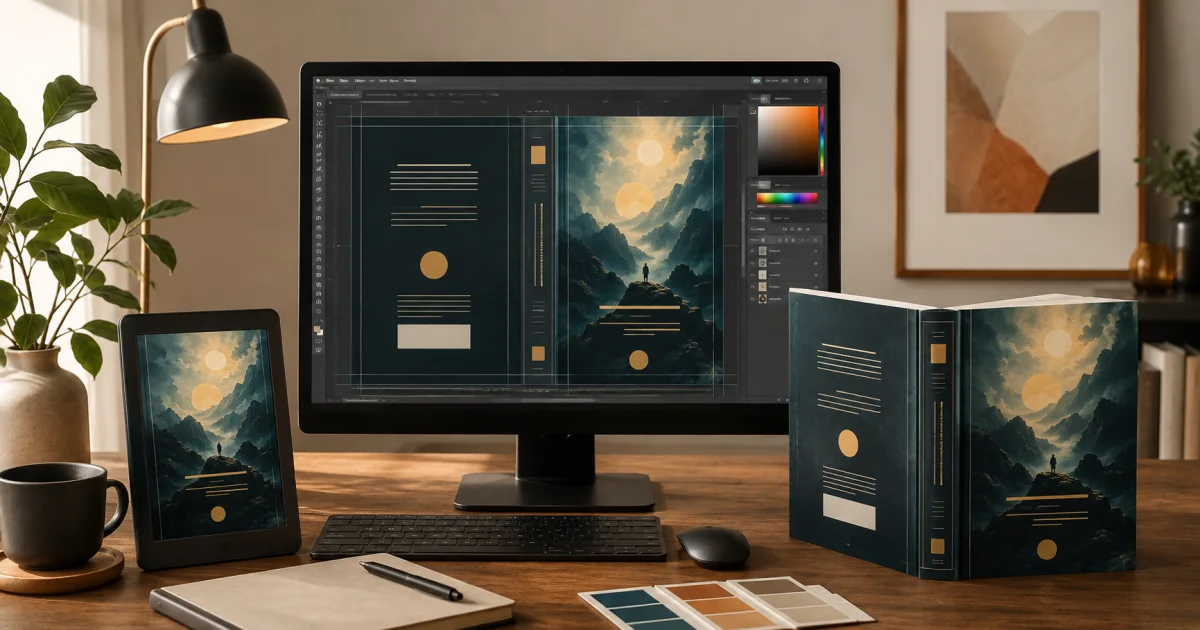
A good book cover creator does more than decorate a rectangle. It helps you turn a book’s format, audience, production specifications, artwork, and typography into a cover that attracts attention and survives the publishing process.
That process is different for a Kindle ebook, which needs a front-only image, and a print book, which needs a precisely sized back-spine-front wrap. Yet the creative goal is the same: communicate genre, subject, and quality in a fraction of a second.
This guide walks through the complete workflow in the order an author should actually use it. It does not replace a production template or a detailed dimensions reference. Instead, it shows when each technical decision belongs, how it affects the design, and how to move from an idea to a publishing-ready file.
Quick answer The most reliable way to create a professional book cover is to choose the publishing format first, lock the print specifications, build the artwork and typography on a format-aware canvas, preview it at both thumbnail and full size, and export a separate file for each edition. You can do the work with free manual tools, or use a purpose-built book cover maker such as Cover Studio AI with optional paid AI artwork generation.
What Should a Book Cover Creator Help You Do?
A book cover creator may be a general design application, a template-based book cover maker, or a publishing-specific editor. Whatever tool you choose, it should help you control two connected jobs:
- Creative design: artwork, genre signals, color, title hierarchy, author branding, and back-cover content.
- Production setup: correct canvas size, bleed, safe zones, spine placement, barcode planning, preview, and export.
General graphics software can handle the creative job well, but you may need to calculate the print canvas and import guides yourself. A publishing-specific tool can keep those calculations inside the same workflow. Cover Studio AI provides free manual design tools for uploading artwork, arranging editable text, and building covers; paid AI generation is optional when you want help creating original artwork.
The best choice is the one that lets you keep important elements editable and gives you a reliable path to the exact file your publisher expects. A beautiful front image alone is not a finished paperback cover.
Before You Start: Gather the Book Information
Collect the title, subtitle, author name, series information, final back-cover copy, and any endorsements or publisher marks you intend to use. For print, also gather the binding format, trim size, final page count, paper or ink selection, bleed choice, and the specifications for the marketplace where you will publish.
The word final matters. Reformatting the interior can change the page count, which changes the spine and moves the front and back panels. If the interior is still changing, develop the creative direction now, but wait to make the production cover final.
Create a reference board for the book’s market as well. Look at current covers in the same genre and audience—not to copy them, but to identify visual expectations. Notice how much space titles occupy, whether covers are image-led or type-led, what emotional promise the colors make, and what remains recognizable at thumbnail size. Novelists can use the fiction book cover design guide to turn that research into genre signals, a focused concept, and a reader-appropriate hierarchy.
The Complete Book Cover Creation Workflow
The following twelve steps work whether you use a free editor, a general graphics application, or Cover Studio AI. The main difference is how much of the production setup your chosen tool performs for you.
1. Choose the publishing format
Begin with the edition you are making: Kindle ebook, paperback, or hardcover. Do not build one universal file and expect it to work everywhere.
| Edition | Cover you create | Typical output |
|---|---|---|
| Kindle ebook | Front-only portrait cover | High-quality RGB image |
| Paperback | Back, spine, and front in one continuous wrap | Print-ready PDF |
| Case-laminate hardcover | Back board, hinges, spine, front board, and outer wrap | Print-ready PDF |
You can reuse the visual identity across editions, but each format needs its own layout. Start a front-only project with the Kindle Cover Generator, a softcover wrap with the Paperback Cover Generator, or a case-laminate edition with the Hardcover Cover Generator.
2. Determine the correct dimensions
Use the specifications for the exact edition and publishing service. Kindle needs a front image; print needs two trim panels, a spine, and production allowances. Consult the Amazon KDP Cover Size Guide and Book Cover Dimensions guide for the measurements.
3. Choose the trim size
Choose the page format before final pagination. The book trim size guide compares proportions, readability, page count, cover composition, and print economics.
Trim size is the finished page size of a paperback or hardcover. It influences the book’s physical character, interior page count, production cost, and available cover proportions. A compact novel, a business book, and a workbook often benefit from different formats.
Choose trim size while formatting the interior, then keep it consistent in the cover project and publishing setup. If you change it later, reflow the interior, confirm the new page count, and rebuild the cover canvas. Kindle covers are not bound to the print trim size, although the ebook and print editions should still look like the same book.
4. Account for bleed and safe zones
Bleed lets a background image or color continue beyond the final cut, preventing an unintended white edge after normal trimming variation. Safe zones keep titles, names, faces, logos, and back-cover copy away from cuts, folds, and hinges.
Extend nonessential background artwork through the bleed, but move essential content inward. Do not place a thin decorative border directly against the trim edge; even a small manufacturing shift can make it look uneven. Treat the guides in your cover creator as boundaries for risk, not lines to print.
If you work from an overlay, use the KDP Templates guide to choose and check the correct edition-specific template.
5. Calculate spine width for print books
A paperback or hardcover spine is based on the final interior and the publisher’s production rules. Page count and paper choice are common inputs, while hardcover construction adds format-specific geometry. A guess based on another book is not dependable.
Calculate the spine only after the interior is stable, and recalculate it after any pagination change. Very thin books may not permit readable spine text. The detailed math belongs in the KDP cover-size and spine resources; your creation workflow only needs the verified result and an accurate canvas.
6. Select or create cover artwork
Artwork should establish the book’s promise before it tries to explain every plot point or topic. Choose a strong focal idea, leave quieter space for type, and make sure the image still reads when cropped into the required proportions.
You have several practical routes:
- Upload photography, illustration, or artwork you own or have licensed for commercial cover use.
- Build a type-led cover from color, shape, and a restrained visual system.
- Commission an illustrator or designer for a distinctive result.
- Generate concepts or original artwork with an AI tool, then inspect the output carefully and add final text separately.
Cover Studio AI lets you use uploaded artwork with its free manual tools. Optional paid AI generation can speed up visual exploration, but it does not replace judgment about accuracy, rights, genre fit, artifacts, or originality. If you generate art, describe composition and negative space rather than asking the image model to render the final title. The AI book-cover prompt guide explains that process in more detail.
7. Build strong title and author typography
Add the exact title and author name as editable text. Establish a clear order: the title usually leads, while the subtitle, series line, endorsement, and author name support it. Use contrast, scale, spacing, weight, and placement before adding more effects.
Test typography at storefront-thumbnail size and at full print size. At the small view, the title and central image should remain recognizable. At the large view, letterspacing, line breaks, edges, and alignment should feel deliberate. One or two well-chosen font families are often more effective than a collection of decorative styles. Confirm that every font is licensed for commercial use; the Book Cover Font guide covers pairing, genre fit, licensing, and legibility.
8. Design the front cover
The front cover must answer three fast questions: What kind of book is this? What is it called? Why should the intended reader look closer?
Build around one primary focal point and one clear type hierarchy. Check whether the image competes with the title, whether the subtitle is truly necessary at thumbnail size, and whether the colors create sufficient contrast. Compare the cover beside several books in its category. It should belong in that market without becoming indistinguishable from it.
Avoid polishing tiny details too early. First make the silhouette, title block, focal image, and overall contrast work. Then refine spacing, color, texture, and supporting information.
9. Extend print design across the spine and back
For paperback and hardcover editions, turn the front concept into a continuous composition. Decide whether the artwork will wrap naturally, fade into a quieter back panel, or connect through a shared color and texture. Keep the spine visually related without allowing critical details to disappear into a fold.
The back cover is functional space. Give the blurb a comfortable reading width, separate endorsements from the main copy, and use an author bio or photo only when it helps the book. The Full-Wrap Book Cover guide explores continuous composition, spine treatment, and back-panel structure without forcing every cover into the same layout.
10. Leave appropriate barcode space
Most print retail workflows need a barcode on the back cover. Decide whether your publishing service will place it or whether you are supplying one. Reserve a quiet area within the permitted back-cover region, away from trim, folds, essential text, faces, logos, and detailed imagery.
Do not add a decorative placeholder barcode to the production file. If the platform supplies the real barcode, leave the space clear. If you supply it, confirm that it belongs to the correct format and edition and preserves the required contrast and clear area.
11. Preview the finished cover
Previewing is a design step, not a ceremonial final click. Inspect the cover in several useful views:
- As a small grayscale and full-color thumbnail.
- At 100 percent size for image quality and clean type edges.
- With guides visible for trim, safe areas, spine, folds, and barcode space.
- Without guides to catch forgotten overlays or placeholders.
- As a three-dimensional book mockup to judge the spine and panel transitions.
- In the publisher’s previewer after upload.
Proofread every word against the manuscript and publishing metadata. Ask someone unfamiliar with the design to read it. The Book Cover Mistakes guide provides a focused preflight list for image quality, hierarchy, genre fit, spine placement, and proofing.
12. Export a publishing-ready file
Export a separate final file for each edition. A Kindle ebook normally needs a clean front-only RGB image in an accepted format. A print edition normally needs the complete wrap as a PDF at the exact production dimensions. Always check the current requirements of the service receiving the file.
Before export, remove guide overlays and placeholders, preserve adequate image resolution, render type cleanly, and confirm that the document has not been resized by an export preset. Keep the editable source project. If the page count or title changes, revise the source and create a new export instead of editing the flattened final file.
Cover Studio AI brings these steps into one project: choose the format, enter production details, upload or optionally generate artwork, edit text, arrange the full wrap, preview the result, and export the appropriate cover. Start designing a cover when your book information is ready.
Free Manual Tools vs. Paid AI Generation
You do not need AI to make a book cover. A free workflow can combine properly licensed artwork, manual layout tools, publisher templates, and careful previewing. This route gives you direct control and works especially well when you already have a photograph, illustration, brand system, or strong type-led concept.
Paid AI generation is useful for exploring visual directions or producing artwork when you do not have a suitable source image. It is optional, and it should remain one part of the process. You still need to select the strongest concept, examine the image for errors, verify its suitability, add accurate editable typography, and prepare the correct format-specific file.
With Cover Studio AI, authors can begin with free manual cover tools and choose paid AI generation only when it adds value. That separation keeps the practical publishing workflow available even when the artwork comes from somewhere else.
A Professional Book Cover Preflight
Before you publish, verify the decisions that are easiest to miss:
- The design clearly signals the intended genre or subject at thumbnail size.
- Title, subtitle, author name, and series information match the book metadata exactly.
- Artwork and fonts are licensed appropriately and have enough effective resolution.
- Each edition has its own correct canvas and export.
- Print specifications match the final interior, including page count and paper choice.
- Backgrounds extend through required bleed; essential content stays inside safe areas.
- Spine content is permitted, centered, readable, and clear of folds or hinges.
- The back cover has proofread copy and an unobstructed barcode region.
- No template guides, mock text, or temporary elements remain in the export.
- The file passes the publisher’s preview, and a physical proof is reviewed for print editions when practical.
If something fails, fix the editable source. Do not stretch, crop, or patch the final export simply to silence a warning.
Frequently Asked Questions
What is the best book cover creator?
The best book cover creator is one that fits your skill level while supporting the exact edition you plan to publish. Look for editable typography, high-resolution artwork handling, format-specific print layouts, bleed and safe-zone guides, reliable previewing, and correct exports. Cover Studio AI combines those publishing tasks in one workflow, with free manual tools and optional paid AI artwork generation.
Can I create a book cover for free?
Yes. You can create a cover with free layout tools, properly licensed or original artwork, and a template based on your publisher’s specifications. Cover Studio AI also supports a free manual workflow; AI generation is optional and paid. Regardless of price, you are responsible for proofreading, asset rights, production settings, and the final publisher preview.
What size should a book cover be?
There is no single size for every book cover. An ebook uses a front-only image sized to the platform’s current pixel and ratio requirements. A print cover is based on trim size, binding, page count, paper, bleed, and other format-specific allowances. Use the exact specifications for each edition rather than copying a generic size chart.
How do I create a Kindle book cover?
Create a front-only portrait design, use a strong title hierarchy that remains legible as a thumbnail, and export a high-quality RGB image in a format accepted by the publishing platform. Do not include a spine, back cover, barcode, bleed marks, or print template in the Kindle file. The dedicated Kindle cover maker guide walks through the complete artwork, typography, preview, and export workflow.
How do I create a paperback book cover?
Finalize the interior first, then choose the paperback trim, paper, bleed, and final page count. Use those inputs to build a full-wrap canvas, design the front, extend the visual system across the spine and back, reserve barcode space, and export the complete print-ready PDF. Validate it in the publisher’s previewer before ordering a proof.
Does a paperback cover need a spine?
Yes, the physical paperback has a spine, and its full-wrap cover file includes that space between the back and front panels. Whether the spine is wide enough for printed title text depends on the book’s page count and the publisher’s rules. A thin spine may need to remain free of text.
What file format does KDP require for book covers?
KDP requirements depend on the edition. Print covers are generally uploaded as a single full-wrap PDF, while Kindle ebook covers use an accepted front-only image format such as JPEG or TIFF. Requirements can change, so confirm the current file, color, size, and quality guidance in KDP before uploading.
Create the Cover, Then Test It Like a Publisher
A professional cover is the result of coordinated decisions, not a single template or image-generation prompt. Begin with the edition, build on verified specifications, make the creative idea clear, and keep typography and production details editable until the book is final.
When you are ready to move from research to the actual cover, open the Cover Studio AI cover creator. Choose Kindle, paperback, or hardcover; bring your own artwork or use optional AI generation; then design, preview, and export the edition your readers will see.