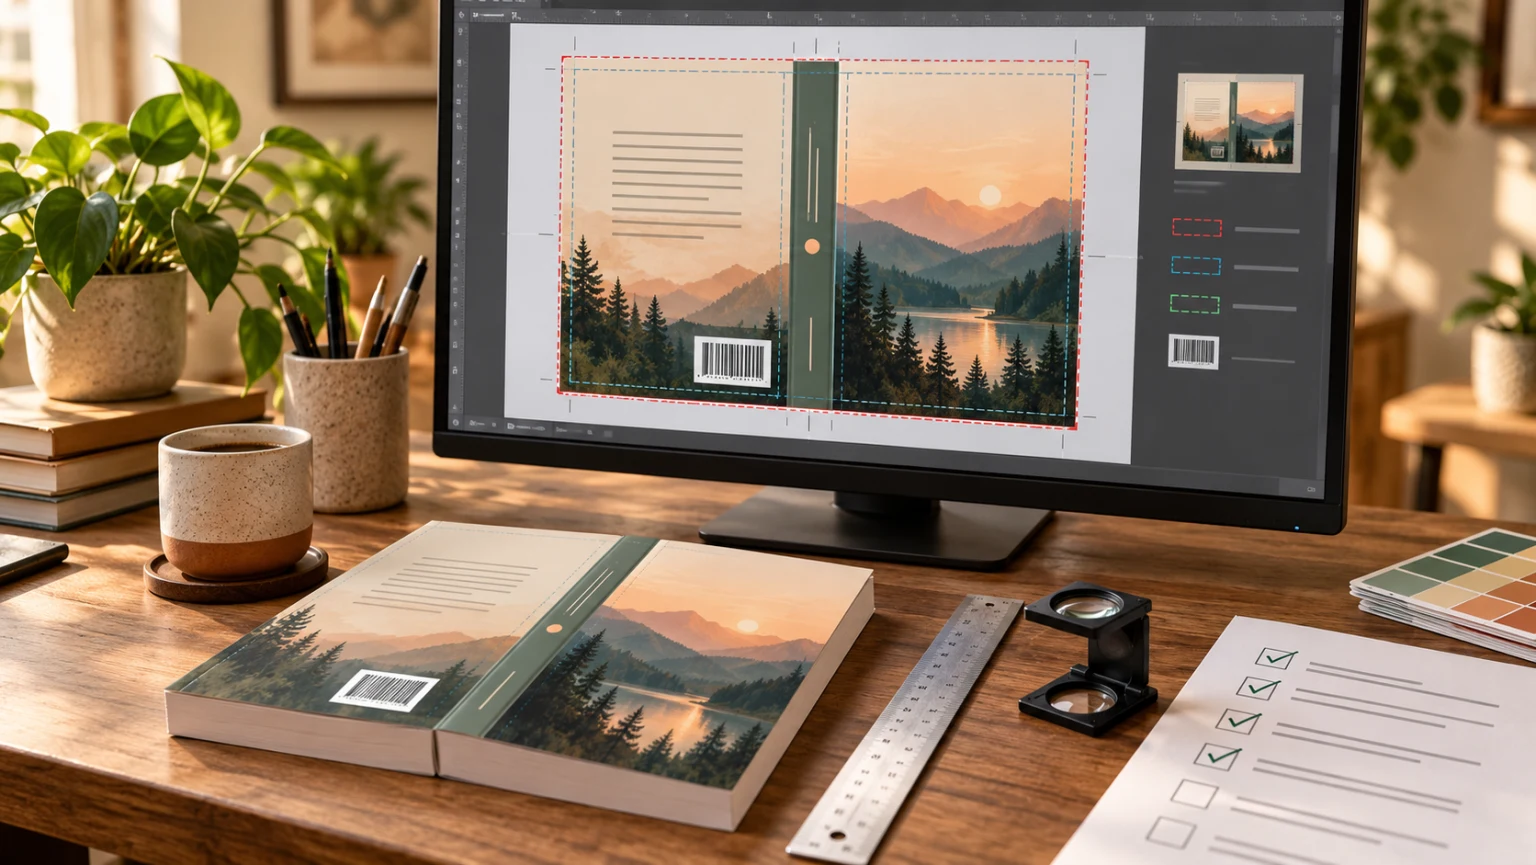
An Amazon KDP cover preflight is the last technical inspection of your paperback cover before upload. It confirms that the file matches the finished interior, fits KDP's current print geometry, protects important content from trim variation, and can pass automated processing without preventable errors.
Quick Answer Before uploading a paperback cover to Amazon KDP, confirm the final trim size, page count, ink and paper settings, then regenerate the cover measurements or template for that exact edition. Check that the PDF contains one continuous back-spine-front wrap, includes 0.125-inch (3.2 mm) bleed on the top, bottom, and outside edges, keeps text inside safe areas, uses the correct spine width, leaves a valid barcode area, and contains images at 300 DPI at their final placed size. Embed fonts, flatten transparency, remove guides and crop marks, and inspect the uploaded cover in Print Previewer with the final interior.
This checklist is intentionally about verification, not initial construction. If you still need to build the canvas, start with the KDP cover size guide or calculate the complete cover size step by step. Return here when you have a finished PDF to inspect.
What KDP Cover Preflight Means
Preflight is a quality-control pass between design and publication. A designer may love the artwork, typography, and back-cover copy while the production file is still wrong. A beautiful cover can fail because its canvas is a fraction of an inch too small, its spine was calculated from an earlier manuscript, or its fonts were not embedded.
The most reliable preflight compares three things:
- The KDP book setup: binding, trim size, ink, paper, reading direction, and page count.
- The finished interior: the actual PDF whose processed page count determines the spine.
- The cover PDF: its page size, panel layout, bleed, safe areas, resolution, barcode plan, and technical construction.
Do not check the cover in isolation. The cover and interior are a matched manufacturing pair. If either file changes, some preflight checks must be repeated.
The KDP Paperback Cover Preflight Checklist
Use the following order. It catches expensive geometry mistakes before you spend time inspecting details such as typography and color.
1. Lock the final edition specifications
Write down the exact production settings shown in KDP:
- paperback binding;
- trim width and trim height;
- black-and-white, standard color, or premium color interior;
- white or cream paper when the selected interior supports that choice;
- left-to-right or right-to-left reading direction;
- final processed page count; and
- whether you will supply a barcode.
These are not administrative details. They are inputs to the cover measurements. Changing trim size changes both panels. Changing page count, ink, or paper can change the spine. Changing reading direction changes the panel order.
Use the page count from the final formatted interior, not the word-processing document and not an estimate. If you revise the manuscript after preflight, process the interior again and check whether the count changed.
2. Compare the PDF page size with the required full-wrap dimensions
A paperback cover is one landscape PDF page containing the back cover, spine, and front cover. For a standard left-to-right book, the order is:
Back cover + spine + front cover
The general equations are:
Full cover width = 0.125-inch bleed + back trim width + spine width + front trim width + 0.125-inch bleed
Full cover height = 0.125-inch bleed + trim height + 0.125-inch bleed
That makes the total height 0.25 inch greater than the trim height. The width includes two trim-width panels, the calculated spine, and 0.25 inch of outer bleed.
Do not treat this formula as a substitute for an edition-specific template. Generate a fresh template using the current settings, then compare its full-cover width and height with the actual PDF page size. The KDP cover calculator and template guide explains how to generate and read that reference.
A quick measurement example
Suppose a book has a 6 × 9-inch trim and its current production settings produce a 0.50-inch spine. The expected canvas would be:
- width: 0.125 + 6 + 0.50 + 6 + 0.125 = 12.75 inches;
- height: 0.125 + 9 + 0.125 = 9.25 inches.
The 0.50-inch spine in this example is an assumed value, not a reusable answer. Calculate the real spine from the actual edition.
3. Recheck spine width against the final page count
Spine width is one of the most common late-stage mismatches. It depends on the page count and applicable paper specification, so a cover made before interior formatting was complete may no longer fit.
Confirm all of the following:
- the page count in your calculation matches KDP's processed interior;
- the paper and interior type match the KDP setup;
- the spine guides in the cover file match the newest template; and
- the title, author name, and any publisher mark are centered within the spine safe area.
KDP currently allows printed spine text only on books with more than 79 pages. If the book has fewer than 79 pages, remove spine text rather than shrinking it into a narrow space. For eligible books, leave at least 0.0625 inch (1.6 mm) between spine text and each edge of the spine.
For formulas and paper-specific planning, use the KDP spine width guide or the spine width calculator.
4. Verify bleed on every required edge
All KDP print covers require bleed. Background color, texture, photography, and illustration must continue 0.125 inch (3.2 mm) beyond the trim line at the top, bottom, and two outside edges of the complete wrap.
Zoom in and inspect each edge. Look for:
- white or transparent slivers between the artwork and PDF boundary;
- a background that stops exactly at the trim line;
- an image frame or border that will reveal small trim variation;
- front or back artwork extended outward but not above or below; and
- an accidental white perimeter created during export.
Bleed is sacrificial. Expect it to be trimmed away. Never put a subtitle, logo, face, review quote, or other important detail in that region.
5. Check safe margins and fold clearance
KDP's basic cover instructions place front- and back-cover text at least 0.125 inch (3.2 mm) inside the trim lines. A conservative layout may use more space when the design allows it. The goal is not merely to avoid rejection; it is to keep content from looking crowded after normal trim variation.
Inspect the front, back, and spine independently:
- no front- or back-cover text enters the spine area;
- title, subtitle, author name, blurb, endorsements, and logos remain inside the template safe areas;
- faces, fine borders, and essential illustration details are not close to a cut or fold;
- spine text clears both spine edges by at least 0.0625 inch; and
- decorative lines remain far enough from trim to avoid looking uneven.
Use the template overlay for this inspection, but turn that layer off before export. The KDP cover templates article explains what each guide means.
6. Measure image resolution at final placed size
KDP requires cover images to be at least 300 DPI at the size at which they will print. The phrase at final placed size matters. A 1200-pixel image can be 300 DPI at 4 inches wide, but only 150 DPI when enlarged to 8 inches.
Use this formula for each important raster image:
Effective DPI = pixel dimension ÷ printed dimension in inches
For example, an image 1800 pixels wide placed at 6 inches is 300 DPI. If that same file is stretched to 9 inches, it is only 200 DPI.
Check the full-resolution source rather than trusting a DPI label in the file metadata. Enlarging a small image or changing its metadata to “300 DPI” does not create missing detail. Pay particular attention to generated artwork, stock previews, screenshots, author photos, logos, and textures stretched across the full wrap.
For a deeper quality check, including PPI versus DPI and upscaling limits, read the book cover resolution guide.
7. Inspect barcode placement
You may upload a cover with your own barcode or allow KDP to place one. Decide which workflow you are using before export.
If KDP will add the barcode, leave the template's barcode area free of essential text and artwork. A quiet background is helpful, but do not draw a fake barcode box or place instructions in the final file. If you supply the barcode, confirm that it uses the correct ISBN, fits entirely within the permitted area, has adequate contrast and quiet space, and is not duplicated elsewhere.
For left-to-right paperbacks, the barcode belongs on the back cover, conventionally toward the lower-right area indicated by the current template. Right-to-left templates reverse the panel arrangement and place it on the appropriate back-cover side. Always follow the generated template rather than a screenshot from another book. See the KDP barcode guide for ISBN and placement decisions.
8. Match every piece of book metadata
Compare the cover with the title setup and interior copyright or title page. The title, subtitle, author or contributor name, edition information, imprint, language, and ISBN must be consistent wherever they appear.
Small differences can trigger review problems. “A. J. Rivera” is not identical to “AJ Rivera,” and a subtitle omitted from one location may need attention. Also proofread the back-cover description independently. KDP's automated checks cannot protect you from a perfectly printable typo.
9. Inspect the PDF construction
Open the exported PDF in a viewer other than the design application. Confirm that it has exactly one cover page and that the artwork looks the same as the source.
Then verify the technical file:
- fonts are fully embedded or intentionally converted to outlines;
- real bold and italic font files are used instead of faux styles;
- transparency and layers are flattened;
- no crop marks, trim marks, color bars, annotations, bookmarks, comments, or invisible objects remain;
- the downloaded template, guide labels, and software watermarks are absent;
- the PDF is not password-protected, locked, or encrypted;
- the filename contains no emoji or unsupported special characters; and
- the file is optimized to a practical size.
KDP states that files larger than 650 MB will not convert and recommends keeping a cover at 40 MB or less for better transfer and processing performance. Do not destroy image quality merely to reach the recommendation; remove hidden data and use sensible PDF optimization first.
10. Review at full size and thumbnail size
Technical acceptance is only half of preflight. Check the front cover at the small size shoppers will see in search results. The title, primary image, and genre signal should remain clear without relying on tiny details.
At full size, inspect spelling, line breaks, edge halos, masking errors, compression artifacts, and awkward transitions across the spine. Zoom to 100% for a realistic screen inspection and higher for edge defects. If possible, ask someone who has not been staring at the design to perform a final proofread.
11. Upload the final interior before judging the cover
The interior controls the processed page count and therefore the expected spine. Upload the final interior, allow it to finish processing, and then upload the matching cover. Do not approve a cover against an earlier manuscript version.
In KDP Print Previewer, inspect:
- red or dashed warning boundaries;
- cover size and bleed messages;
- spine alignment and text clearance;
- barcode placement;
- content near trim or fold lines;
- unexpected font substitutions; and
- any warning created by the relationship between the cover and interior.
Treat Previewer as a validation stage, not as a repair tool. Return to the source file, correct the cause, export a new PDF, and upload it again.
12. Order a physical proof
A Previewer pass means the file is eligible to move forward; it does not prove the physical result is ideal. Order a proof when the schedule allows and inspect it in normal reading light.
Check trim balance, spine centering, color and shadow detail, small type, barcode quality, cover finish, and the transition between panels. Expect some manufacturing variation, but revise anything that remains visibly weak within that normal range.
Common KDP Cover Rejection Issues and Their Fixes
| Warning or rejection | Likely cause | Practical fix |
|---|---|---|
| Cover size does not match expected dimensions | Wrong trim, page count, paper setting, or PDF page size | Regenerate the current template, rebuild or resize from the source, and export at the exact full-wrap dimensions. |
| Insufficient bleed or white edge | Artwork stops at trim or export added white canvas | Extend backgrounds through the full 0.125-inch bleed and remove surrounding whitespace. |
| Text outside the safe area | Copy is too close to trim, fold, or spine edge | Move it inward in the source file; do not rely on scaling during upload. |
| Spine text is not allowed | Book has fewer than 80 pages | Remove all spine text and export again. |
| Spine text crosses a fold | Spine width is stale or text lacks clearance | Recalculate from the processed page count and keep 0.0625 inch clear on each side. |
| Low-resolution image | Source pixels are insufficient at placed size | Replace it with a larger original, reduce its printed size, or recreate it; changing the DPI tag alone does not help. |
| Font error or substituted type | Font is not embedded, cannot embed, or uses faux bold/italic | Use a licensed embeddable font, install the real style, or outline final cover type after saving an editable copy. |
| Transparency or layer error | Live effects or layered content survived export | Flatten transparency and layers in the native file, then export a new PDF. |
| Barcode conflict | Important content occupies KDP's placement area or two barcodes are present | Clear the template barcode zone or remove the duplicate barcode. |
| Processing failure | Locked PDF, unsupported filename, marks, comments, metadata, or excessive file size | Remove security and non-print objects, simplify the filename, optimize the PDF, and upload again. |
| Details do not match | Cover wording differs from KDP title setup or interior | Make title, subtitle, contributors, edition, imprint, and ISBN consistent across all locations. |
For more diagnostic examples, use the dedicated guide to fixing Amazon KDP cover errors. The broader common book cover mistakes article covers visual and production problems earlier in the design process.
How Cover Studio AI Helps Prepare a KDP Cover
Cover Studio AI connects the creative cover workflow with the production measurements authors need for paperback publishing. Start a paperback project with the final trim size, page count, and paper settings, then arrange the front, spine, and back within a measured wrap instead of improvising the canvas.
Its practical role in preflight is to reduce setup errors: authors can work with visible panel and guide boundaries, reserve barcode space, place editable typography, and export a complete print cover. You can generate artwork or upload artwork you have the right to use, then prepare the entire edition in one workflow.
No design tool can certify an estimated page count or override KDP's current Previewer. The author still needs to verify the final interior, proofread metadata, inspect image quality, and approve the uploaded files. Think of Cover Studio AI as the preparation workspace and KDP Previewer as the final platform check.
Start a Cover Studio AI project, explore the paperback cover generator, or use the free KDP paperback cover calculator before rebuilding a mismatched file.
A Five-Minute Final Check Before You Click Upload
If you have already completed a full preflight, run this short check immediately before upload:
- Confirm the interior PDF is the final version and record its page count.
- Confirm KDP's trim, ink, paper, and reading-direction settings.
- Compare the cover PDF dimensions with a fresh edition-specific template.
- Scan all four outside edges for complete bleed.
- Check front, back, and spine text against safe-area guides.
- Verify images are at least 300 DPI at placed size.
- Confirm the barcode plan and clear zone.
- Check embedded fonts, flattened transparency, and removed template elements.
- Compare cover metadata with KDP title setup.
- Open the exported PDF once more before uploading it with the matching interior.
Save the full checklist with your source files. If the manuscript changes later, you will know exactly which measurements and inspections to repeat.
Frequently Asked Questions
What should I check before uploading a cover to KDP?
Check the final trim size, processed page count, paper and ink settings, complete PDF dimensions, spine width, 0.125-inch bleed, safe margins, effective image resolution, barcode area, matching metadata, embedded fonts, flattened transparency, and absence of crop marks or template guides. Then inspect the cover with the matching interior in KDP Print Previewer.
What measurements do I need for a KDP paperback cover?
You need the trim width and height of one panel, the spine width calculated for the final page count and paper specification, and 0.125-inch bleed at the top, bottom, and each outside edge. Use KDP's current cover calculator or an edition-specific template for the final measurements.
Does every KDP paperback cover need bleed?
Yes. KDP's current guidance requires bleed on print covers. Extend backgrounds 0.125 inch beyond the trim line at the top, bottom, and outside edges, while keeping important content inside the safe areas.
How much safe margin should a KDP cover have?
KDP instructs authors to keep front- and back-cover text at least 0.125 inch inside trim lines and spine text at least 0.0625 inch from either spine edge. Follow the safe areas in the current generated template, and use more breathing room when the design permits.
How do I know whether a cover image is 300 DPI?
Divide the image's pixel dimension by its printed dimension in inches. An 1800-pixel-wide image placed 6 inches wide is 300 DPI. Check effective resolution after scaling; editing the metadata to say “300 DPI” does not increase detail.
Can I upload a KDP paperback cover without a barcode?
Yes. KDP can place a barcode on the back cover. Keep the barcode region shown in the template free of essential text and artwork. If you provide your own, use the correct ISBN, maintain scannable contrast and quiet space, and do not include a second barcode.
Why is KDP rejecting my cover size?
The usual cause is a mismatch between the PDF page size and the selected trim, processed page count, paper, ink, or binding settings. Generate a new template from the current edition details and compare it with the source canvas and exported PDF.
Can a paperback with fewer than 80 pages have spine text?
No. KDP prints spine text only on books with more than 79 pages. Remove the spine text completely for a shorter book, even if it appears to fit in your design file.
Should I include crop marks on a KDP cover PDF?
No. Remove crop marks, trim marks, color bars, template labels, annotations, and other non-cover elements before export. The PDF page itself should match the required full-cover dimensions including bleed.
Is passing KDP Print Previewer enough?
It confirms that KDP's automated preview has not found a blocking issue, but it is not a substitute for proofreading or a physical proof. Inspect the rendered preview carefully and order a proof to evaluate trim, spine alignment, color, type size, finish, and barcode reproduction.