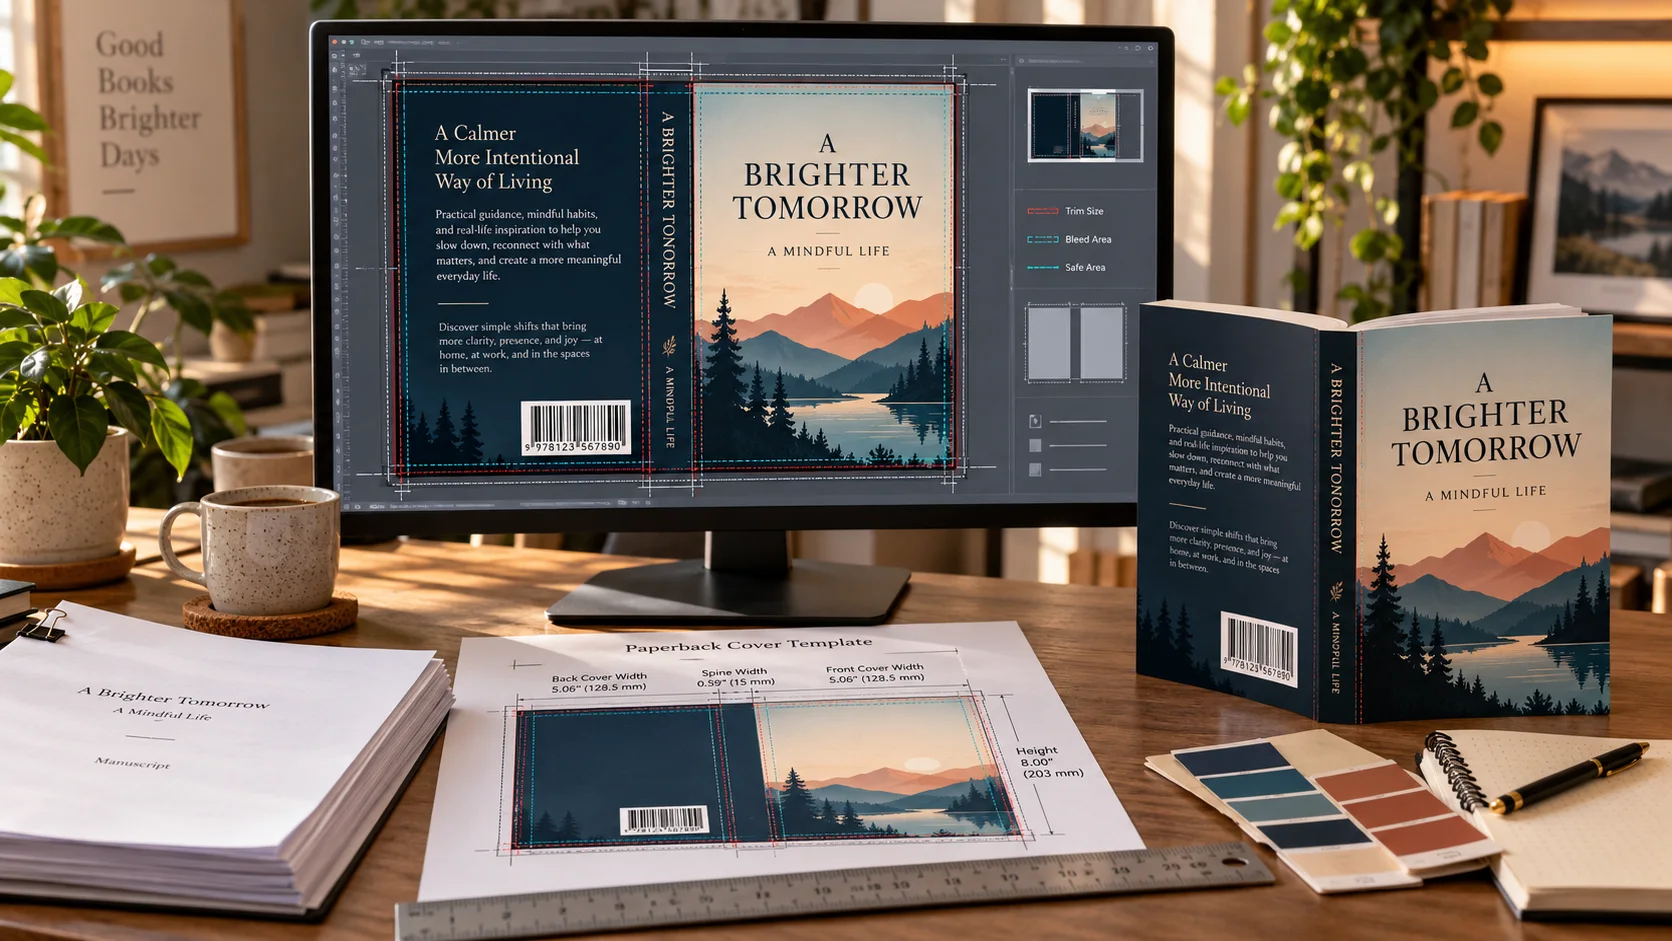
An Amazon paperback cover designer creates more than an attractive front image. A complete paperback cover is one print-ready wrap containing the back cover, spine, and front cover, built to fit the exact specifications of the finished book. Trim size, final page count, paper choice, bleed, safe areas, and barcode placement all affect the file an author uploads to Amazon KDP.
Quick Answer To create a print-ready KDP paperback cover, finish and format the manuscript first. Choose the book's trim size, confirm the final page count and paper settings, and use those specifications to generate the correct full-wrap dimensions and spine width. Design the front, spine, and back on that measured canvas; extend backgrounds through bleed; keep essential content inside safe areas; reserve the barcode region; then export a print-ready PDF and inspect it in the KDP previewer. Cover Studio AI helps build the correctly sized layout so authors do not have to calculate and position every panel manually.
This guide explains the complete process. For exact measurements, use the linked Cover Studio AI calculators and reference articles rather than relying on dimensions copied from another book.
What Is an Amazon Paperback Cover Designer?
An Amazon paperback cover designer may be a professional, an application, or an online tool. Whatever method you choose, the result must solve two problems:
- Marketing: The front cover must communicate genre, subject, tone, and quality quickly, especially at a small Amazon thumbnail size.
- Print production: The full file must fit the physical book, protect important content from trimming and folding, and export in a format suitable for upload.
A useful KDP paperback cover maker therefore needs more than image generation. It should support typography, the back cover, spine, production guides, and a wrap based on the actual book settings.
Why a Paperback Cover Is Not Just a Front-Cover Image
A front-cover image represents only one panel of a paperback. It does not include the book description, author information, spine, bleed, safe areas, or planned barcode space. It also cannot know how thick the printed book will be.
The paperback production file is normally one wide composition arranged from left to right:
Back cover + spine + front cover
The width of the front and back panels comes from the selected trim size. The width of the spine comes from the final page count and the applicable paper specifications. Bleed extends the background beyond the outer cut edges. Safe areas keep text and essential artwork away from places where normal print and trim variation could make them look crowded or cut them off.
This is why generating a beautiful portrait image is not the same as creating a printable cover. That image may become the visual foundation of the front, but it must still be integrated into an exact full-wrap layout. For a detailed comparison of production measurements, see the book cover dimensions guide. For composition across all three panels, use the full-wrap book cover guide.
What Does a Complete KDP Paperback Cover Need?
Front cover
The front cover carries the primary sales message. It usually includes the title, author name, and necessary subtitle or series information. Its imagery, typography, hierarchy, and color should signal the right category. Test it at thumbnail size; the visual idea and hierarchy should remain clear.
Spine
The spine connects the panels and identifies the book on a shelf. It may include the title, author name, series information, or a small publisher mark when space permits. Its width comes from the edition specifications.
Finish the interior before finalizing the spine. Changing trim, type size, margins, paragraph spacing, or front matter may change the page count and invalidate the cover. Use the KDP spine width calculator for planning and the KDP cover-size and spine guide for the underlying workflow.
Back cover
The back commonly contains a concise description and may include endorsements, an author bio or photo, a publisher mark, or a website. Use short paragraphs, comfortable line length, and sufficient contrast. Continue the front's visual language, but keep copy readable. The book back-cover design guide covers hierarchy and layout.
Trim size
Trim size is the final width and height of one cut page. It defines both panels and can change interior pagination.
Select trim size before final formatting, based on the book type, content, desired reading experience, and options currently available for the edition. The book trim-size guide helps authors compare those tradeoffs without turning this article into another dimensions table.
Final page count
The production page count comes from the final formatted interior, not the word-processing manuscript or an estimate. Because it helps determine spine width, an interior revision may require a new layout.
Bleed and safe areas
Bleed continues background art beyond the trim line to prevent unintended white slivers. A safe area keeps text, faces, logos, and fine borders inside cut and fold boundaries.
Extend backgrounds into bleed, but do not place essential information there. A template or production-aware editor should display both boundaries. See the KDP cover template guide for an explanation of trim lines, bleed, folds, and safe zones.
Barcode area
A print edition needs a barcode associated with its ISBN workflow. Reserve uncluttered back-cover space so it does not cover copy or essential artwork. Whether you supply it or the publishing workflow places it, avoid including two. See the KDP barcode and ISBN guide.
Print-ready export
The design must become a full-wrap file matching the edition. Confirm that fonts and images reproduce correctly, guides are excluded, backgrounds reach through bleed, and essential objects avoid risky boundaries. Do not use a Kindle front image as a paperback cover.
Always inspect the uploaded interior and cover together in the current KDP previewer. A clean export does not replace that final check.
Step-by-Step: From Finished Manuscript to Print-Ready Cover
1. Finish editing and format the interior
Complete editing, proofreading, and interior formatting before locking the cover. Set the page size, margins, fonts, spacing, front matter, chapter openings, and intentional blank pages, then record the final page count.
If the manuscript is still changing, you can explore front-cover concepts, but label any print layout as provisional.
2. Choose the paperback trim size
Choose a trim that suits the content and reader expectations, then format the interior for it. A compact novel, illustrated workbook, and technical manual may need different proportions.
Confirm that the format, ink, paper, and distribution combination you intend to use supports the selected trim. Then keep that setting consistent between the interior, cover, and KDP book setup.
3. Confirm page count and paper settings
Use the final page count and actual paper or ink selection. If either changes, regenerate the template and recheck the cover.
4. Calculate the spine and complete wrap
Enter the trim, page count, and paper settings into a current calculator or template. It should define the back, spine, front, outer bleed, and safe zones.
For a planning calculation, use the KDP paperback cover calculator. To understand how the complete canvas is derived, consult how to calculate KDP book cover size. Use the current template or preview for the exact book when it differs from a general example.
5. Develop the front-cover concept
Write a brief with the exact title and author, genre or subject, target reader, tone, visual idea, and elements to avoid. Research comparable books, then create a distinct concept readers will recognize.
Choose one dominant idea instead of illustrating every chapter or plot point. If you generate artwork with AI, request clean artwork with usable space for type. Add the title and author name as editable text rather than relying on lettering embedded in the image.
6. Build the front panel on the measured canvas
Place artwork within the front guides. Set the title, subtitle, series line, and author with deliberate hierarchy. Check contrast full-size and as a thumbnail. Keep essential text and faces inside the safe area.
Proofread the cover separately from the manuscript. Titles, names, punctuation, and series information are easy to overlook when you have seen them repeatedly.
7. Design the spine
Extend the visual system across the spine without letting important details drift into the fold. Center permitted text within the safe region. If the spine is too narrow, omit text rather than crowding it.
8. Design the back cover
Write a concise description with a strong opening and scannable paragraphs. Maintain contrast and a clear reading order. Reserve the barcode region early.
Continue colors, textures, or scenery from the front in a controlled way. Avoid simply stretching the front image across the full width; stretched subjects and distorted focal points make the wrap look accidental.
9. Preflight the complete cover
Review the wrap systematically:
- The specifications match the final interior and KDP setup.
- The front, spine, and back are in the correct positions.
- Background art reaches all required bleed edges.
- Important content remains inside safe areas.
- Spine text is centered and has adequate clearance.
- Back-cover copy is accurate, readable, and proofread.
- The barcode area is clear and intentional.
- Images are sharp enough at their placed size.
- No template lines, placeholder text, or hidden objects will export.
For a broader last check, use the common KDP cover mistakes guide.
10. Export, upload, preview, and proof
Export the wrap as a print-ready PDF for the edition. Upload it with the matching interior and review KDP's preview. Inspect the source whenever a warning appears.
Inspect type, images, boundaries, and spine alignment. Order a physical proof when possible; a screen cannot fully predict trimming, paper color, surface appearance, or small type.
Practical Example: A 6 × 9-Inch Paperback
Imagine an author has finished formatting a nonfiction paperback at a 6 × 9-inch trim size. The interior has a final page count, and the author has selected the paper and ink settings for that edition.
The author should not open a generic 12 × 9-inch canvas and guess at the spine. Instead, those exact production inputs go into the paperback calculator or template workflow. The resulting layout provides two 6 × 9-inch trim panels, the calculated spine between them, and the applicable outer bleed and safe-area guides.
The designer places the concept on the right-hand front, carries a restrained background across the spine, and puts the description on the left-hand back. A quiet barcode region remains. If pagination changes, the author regenerates the layout.
The important lesson is not a reusable numerical answer. It is that the cover belongs to one specific edition of one finished book.
How Cover Studio AI Simplifies Paperback Cover Design
Cover Studio AI is an online Amazon book cover creator connecting visual design with print setup. Authors enter their specifications and work on a properly sized cover instead of drawing every panel, bleed, and guide manually.
A practical Cover Studio AI workflow is:
- Start a paperback project and enter the final book specifications.
- Generate or upload front-cover artwork you have the right to use.
- Add editable title and author typography.
- Compose the spine and back within the generated layout.
- Check guide boundaries and barcode clearance.
- Export the completed print cover and verify it with the matching interior.
The tool reduces repetitive setup, but the author still makes the publishing decisions: choosing the trim size, providing the final page count, selecting an accurate genre direction, proofreading the copy, and approving the preview. Ready to build the wrap? Start a Cover Studio AI project or review the paperback cover generator.
Online Tool or Professional Human Cover Designer?
An online tool works well when you have a clear concept, want hands-on control, or need multiple consistent editions. It is especially useful when the main obstacle is accurate setup and panel alignment.
Consider hiring a professional human cover designer when:
- the book is central to a larger commercial launch;
- you need original illustration, custom lettering, or complex photo compositing;
- your genre positioning is unclear and needs strategic art direction;
- the book belongs to a series that needs a durable brand system;
- you lack the time or confidence to judge typography and visual hierarchy;
- special print requirements or multiple formats make production unusually complex.
The paths can work together: use a designer for creative direction, then a tool for later editions, or build a concept in Cover Studio AI for a designer to refine. Always provide final interior specifications and request editable source files plus the production export.
Frequently Asked Questions
What is the best Amazon paperback cover designer?
The best option is one that fits your creative needs and produces a full wrap from the exact specifications of your book. Look for editable typography, front-spine-back layout support, bleed and safe-area guides, barcode planning, and print-ready export—not only image generation.
What file does a KDP paperback cover need?
A paperback needs a complete full-wrap cover file containing the back, spine, and front, built for the selected edition. Follow the current upload requirements shown in your KDP workflow and validate the exported PDF in the previewer.
Can I make a KDP paperback cover before the manuscript is finished?
You can develop the visual concept and front cover early, but you cannot finalize the production wrap reliably until the interior is formatted and the page count is stable. Page-count or paper changes affect the spine and total width.
How do I know the correct spine width?
Use the final page count and selected paper specifications with a current KDP template or spine calculator. Do not estimate the spine from word count or copy the width from a different book.
Does a paperback cover need bleed?
If color or artwork is intended to reach an outer edge, extend it through the required bleed. Keep important content inside the safe area. Confirm the applicable settings for the exact book in the current publishing workflow.
Where does the barcode go on a paperback cover?
Plan a clear region on the back cover within the permitted template area. Keep important copy and artwork out of that region, and decide whether you or the publishing workflow will supply the barcode so two barcodes are not included.
Can I use the same file for Kindle and paperback?
No. You can reuse the concept and front artwork, but a Kindle cover is a front-only digital image. A paperback cover is a measured print wrap with a back cover, spine, bleed, safe areas, and barcode planning.
Should I hire a cover designer or use a KDP paperback cover maker?
Use a production-aware tool when you want direct control and have a clear concept. Hire a professional when you need strategic art direction, custom artwork, advanced typography, a series identity, or support for a high-stakes launch. A hybrid workflow is often practical.
What should I check before uploading the cover?
Confirm the trim size, final page count, paper settings, spine width, bleed, safe areas, barcode clearance, spelling, image quality, and export format. Upload the matching final interior, inspect the KDP preview carefully, and order a print proof when possible.